>> EVOTHINGS HACKNIGHT - ARDUINO BASED RC BUGGY (PART 1)
Who says going to work should not be fun?

In the midst of World Cup soccer fever we had a night
without football and took the opportunity to use the moment to grab
a few beers, pizzas and get inspired to do something crazy in the
office. The result? We hacked a remote control car replacing the radio
controls with an arduino micro controller so we could control the car
from our mobile devices instead.
For the project we picked up a Sword 1:10 MonsterTruck 4WD 2,4GHz
from our local technical geek store; mainly for its size (big enough to fit
an arduino device inside) and the raw power and crazy suspension it had
for extra coolness bonus points.
 Unlike Eric's initial attempt with the Raspberry Pi Car this time our goal
was to not destroy the controls and see if we could directly integrate with
the servo's of the car to control the steering and drive train of the
device.
Unlike Eric's initial attempt with the Raspberry Pi Car this time our goal
was to not destroy the controls and see if we could directly integrate with
the servo's of the car to control the steering and drive train of the
device.
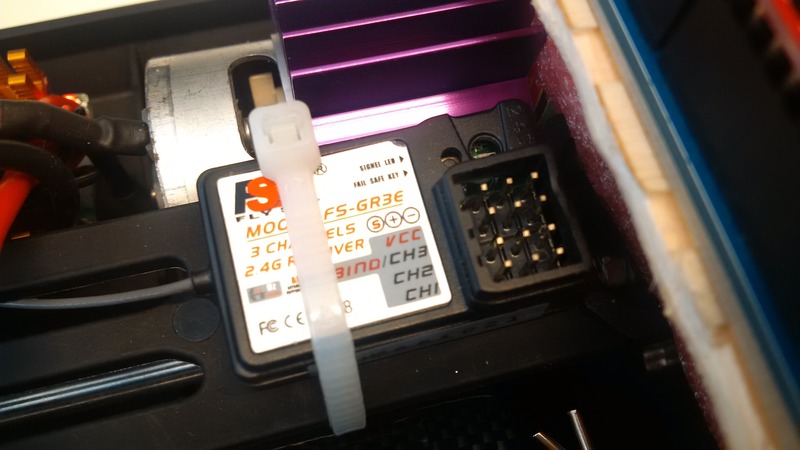
Inside the car we found the FS GR3E Receiver (pictured) and after investigation with an Oscilloscope we saw specific
signal patterns to the servo devices.
The FS GR3E has three channels; only two of them were being used in this
case (one for steering, the other for the drive train). It was clearly
indicated on the receiver that there was a signal, power and ground
connection and that 5.8V was being passed to the steering servo.
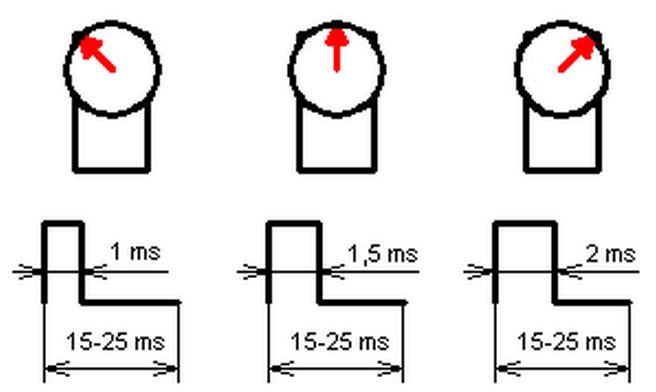
The servos were being controlled with PWM (pulse width modulation)
in a pattern as shown - we quickly identified that we only needed
to connect the ground and signal to our arduino micro controller and
find a way to route power to it.
We quickly wrote up a few simple sketches to test our observations -
and viola! It worked!
To keep things as simple as possible (golden rule) we wanted to implement
a multi-threaded arduino sketch, one thread to monitor network activity
and the other two to send consistent pulses to each servo.
Multi-threading isn't really something out-of-the-box
on the arduino, but we came across
Scheduler ARM/AVR which gave us
exactly what we needed.
For communication we used a
RedBearLab BLE Shield and defined a simple three byte packet pattern in which
the start of communication would be the value -128, followed by the x and
y values (-127 to 127 range). This allowed us to do simple mapping to
pulse modulation period values as follows:
After some fine tuning and experimentation we tweaked our pulse width
modulation patterns (MIN, CENTER, MAX) within the range the car could handle
and after reading a forum post
about latency of multi-threading to adjust the exact timing to be acceptable.
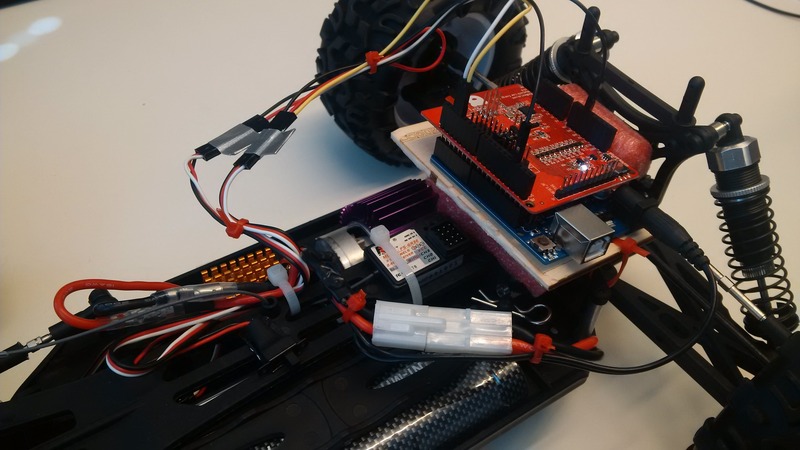
The only modification we needed to make to the car itself was to cut the
7.2V power line from the battery and solder a power cable direct to
the arduino - which can handle any input voltage from 6-20V (reference:
arduino.cc); the rest was just simple wiring, basic shielding
(aluminium foil between some foam) and securing everything down with zip ties.
One thing we wanted to ensure was the ability to restore the car back
to its original controls.
The resulting arduino sketch is available for download below - it is
designed to be generic enough to work with any remote control car that
uses two servos with pulse width modulation over a digital output pin.
If you do manage to use the code for something, let us know!

This concludes part one which focuses on modifying the car itself
and integration an arduino micro controller - the next part will focus on
the mobile application used to control the car using
Evothings Studio on an android or iOS based device; we will also show some
cool videos of the car in action!
![[Valid RSS]](valid-rss-rogers.png "Validate my RSS feed")