>> HANDS-ON WITH DALLAS SEMICONDUCTOR 1-WIRE AND ARDUINO
I was tinkering around with the 1-wire hardware and protocol a while back - time for a blog post!
1-Wire,
designed by Dallas Semiconductor Corp is a device communications bus system
that provides low speed data, signaling and power over a single data wire. It
is typically used to communicate with small inexpensive devices such as digital
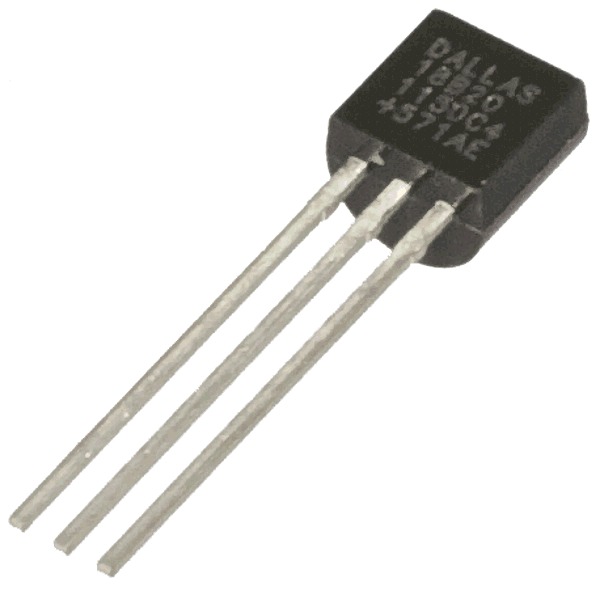
thermometers and weather instrumentation - such as the DS18B20 temperature
sensor which we will connect to an Arduino.
The
raw sensor
can be purchased at a low cost ($4.25 USD) or a
water proof version
version ($9.95 USD) that can report a temperature between -55C and +125C
with 9 to 12-bit precision; which would be sufficient for any basic temperature
monitoring setup you will ever need. You will also need a 4.7kΩ resistor,
a prototyping breadboard and some wire for connecting everything.
Information on the OneWire protocol has been published on the
Arduino Playground - where they refer to a simple easy to use
library written by
Paul Soffregen
- if you want to get fancy, you could even create your own slave devices and
integrate custom 1-wire sensors into your projects.
For the purpose of this post - first we must wire up some sensors, a
fritzing diagram is provided:
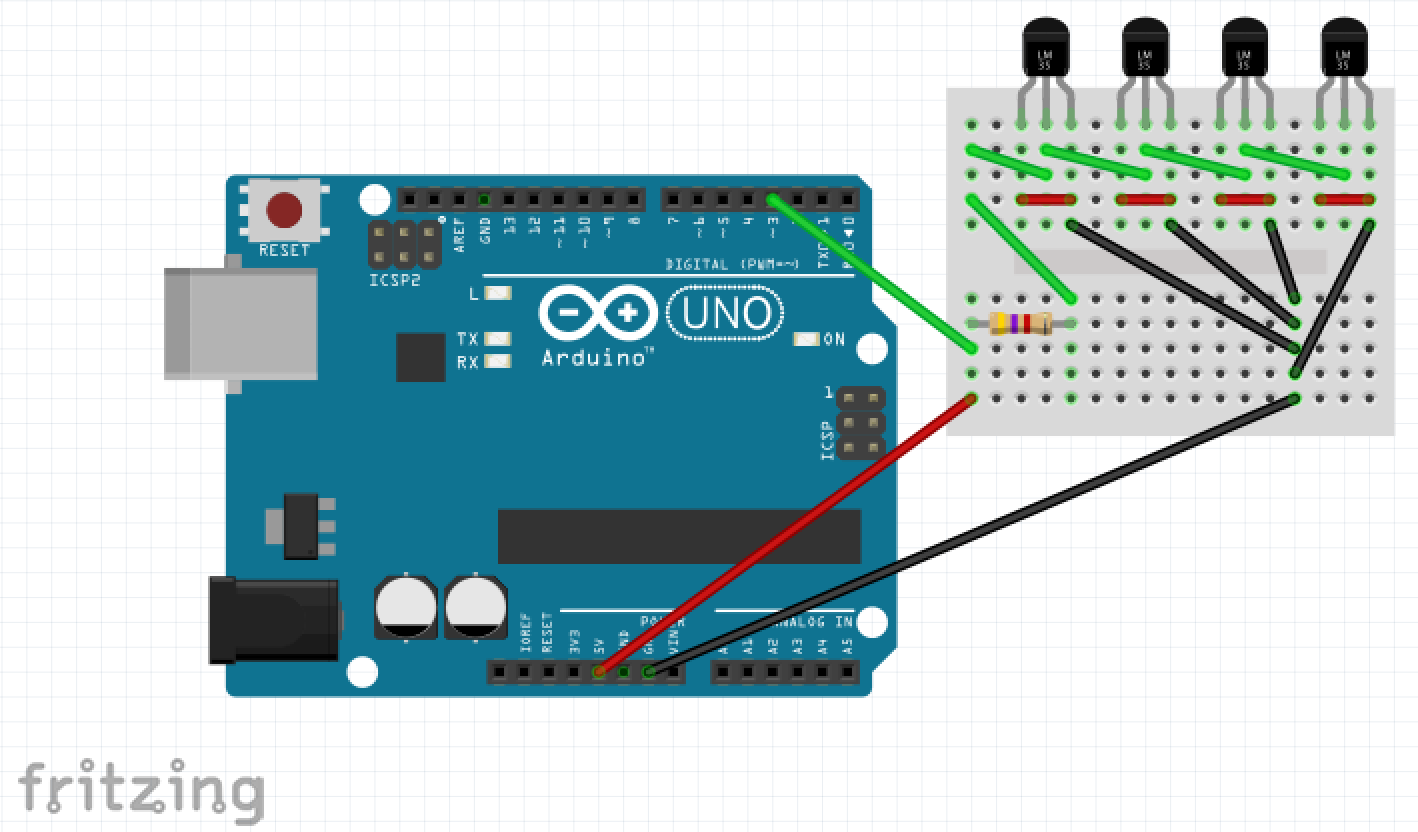
The DS18B20 only requires the connection to a signal and ground channel; the
sensors are parasite power based they can obtain their power from the signal
wire which is connected to a +5V power source via a 4.7kΩ pull-up resistor.
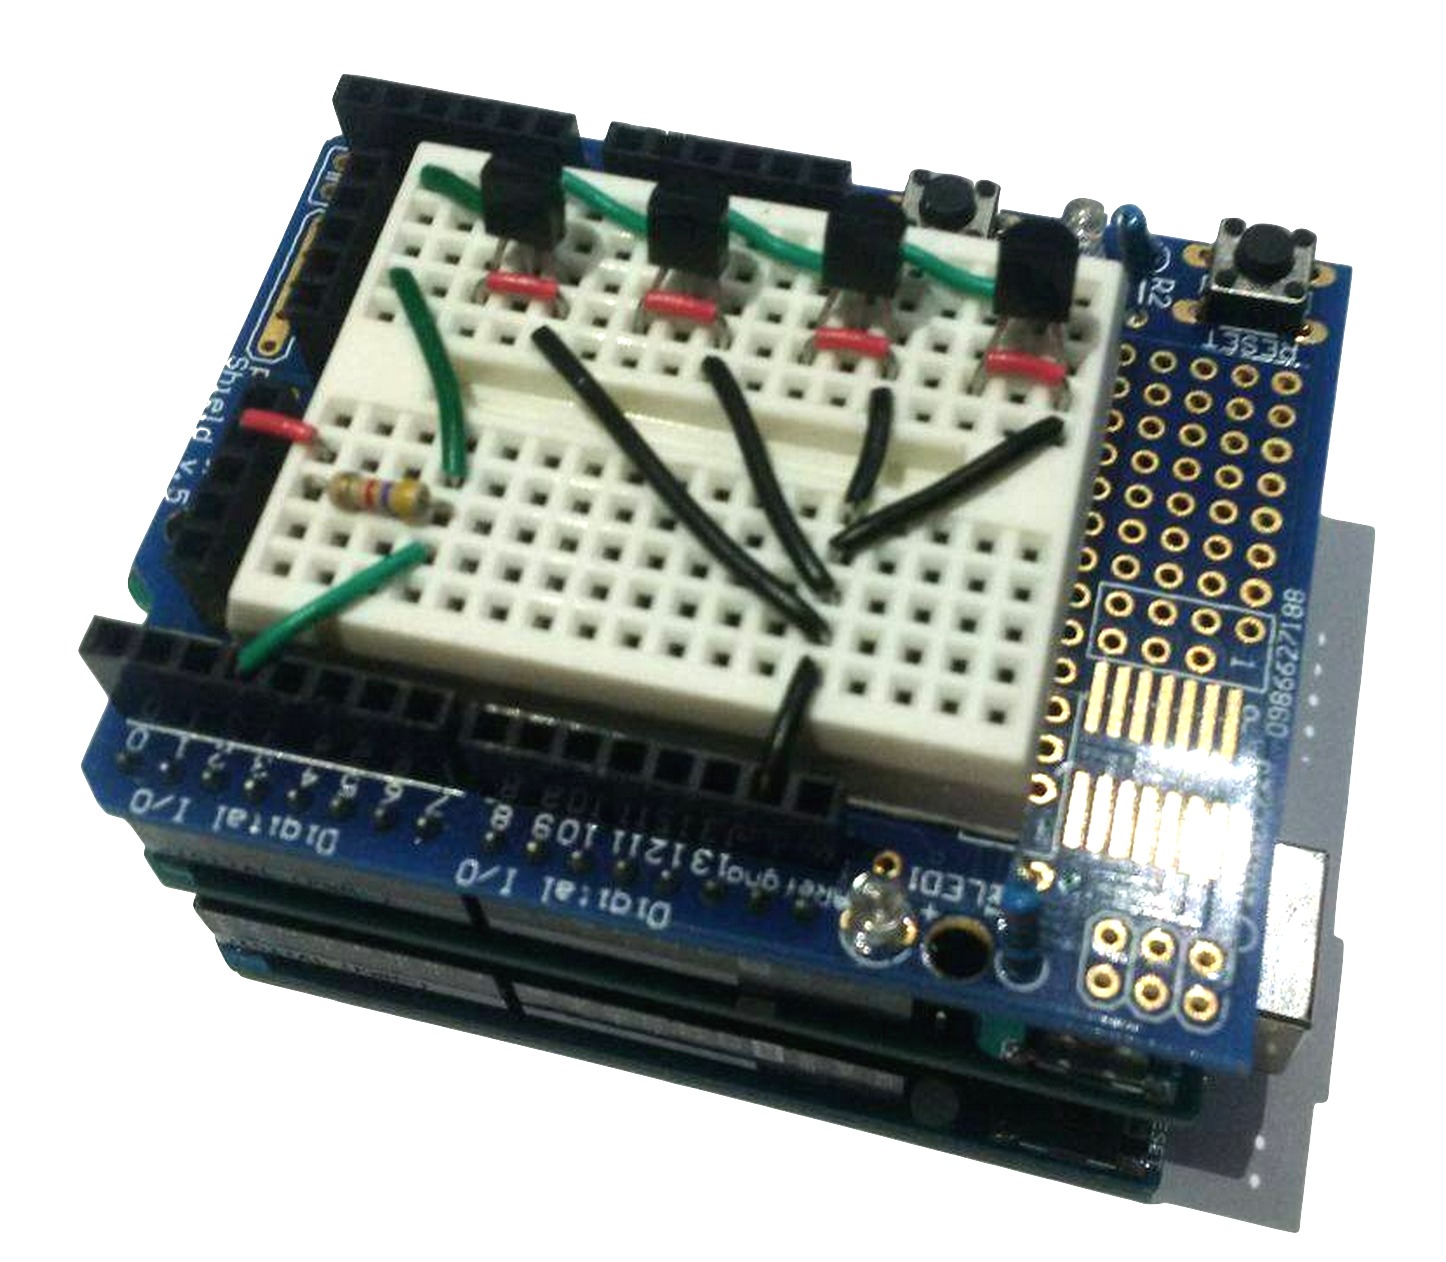
The Arduino with all connections made via a prototyping shield is shown below:
The OneWire library provides a number of examples; even with one specific to
working with the temperature sensors. In the interest of completeness; I have
provided a version of a sketch configured to use the sensor pin as per the
fritzing diagram (PIN 3), available for download:
Let's get an understanding of what is going on in the code:
#include <OneWire.h>

#define ONE_WIRE_PIN 3
OneWire  onewire(ONE_WIRE_PIN);
This is the basis for working with 1-Wire - it takes care of dealing with
the complex signaling and communication to devices on the 1-wire bus. In
the loop() function; an iterator style interface is available to
cycle through each device on the bus:
  byte addr[8];

  // do we have no more addresses?
  if (!onewire.search(addr))
  {
    Serial.println("No more addresses.");
    Serial.println();
    onewire.reset_search();
    delay(250);
    return;
  }
The addr variable contains a 64-bit unique identifier for the
device on the bus - the first byte represents the chip used within the sensor
(0x28 is the DS18B20) and the last digit is a CRC checksum; just
to verify that there hasn't been an interpretation of noise on the signal line.
  // select the device and start the conversion with parasite power
  onewire.reset();
  onewire.select(addr);
  onewire.write(0x44, 1);

  // wait a short period of time for the conversion to be done
  delay(ONE_WIRE_DS18B20_DELAY);

  // read the scratch pad by powering up the line
  onewire.reset();
  onewire.select(addr);
  onewire.write(0xBE);

  // display the raw data
  Serial.print("  Data = ");
  for ( i = 0; i < 9; i++)
    data[i] = onewire.read();
In order to read the data from the sensor; first the device must be selected
and since the device uses parasite power (from the signal line) a small delay
must be performed to allow the sensor to power up and generate the data for
processing. Once this period of time is done; a request to read the scratch
pad is done and nine bytes of data will be available for reading.
  // convert the data to actual temperature
  int16_t raw = (data[1] << 8) | data[0];
  {
    byte cfg = (data[4] & 0x60);

    // at lower res, the low bits are undefined, so let's zero them
    if (cfg == 0x00) raw = raw & ~7; // 9 bit resolution, 93.75 ms
    else if (cfg == 0x20) raw = raw & ~3; // 10 bit res, 187.5 ms
    else if (cfg == 0x40) raw = raw & ~1; // 11 bit res, 375 ms
    //// default is 12 bit resolution, 750 ms conversion time
  }
  celsius = (float)raw / 16.0;
  fahrenheit = celsius * 1.8 + 32.0;
The conversion of raw data to a temperature looks complicated; but it
really comes down to how much time was provided to the sensor to actually
power up and obtain the values. As can be seen, the lower the time between
powering it up and reading the scratch pad affects the resolution of the
result (accuracy). A complete first loop of the devices is shown below
on real hardware:
OneWire Sketch
--------------

author:  Aaron Ardiri
version: Nov 17 2015

ROM = 28 F0 74 DC 06 00 00 DC
  Chip = DS18B20
  Data = AC 01 4B 46 7F FF 04 10 86  CRC=86
  Temperature = 26.75 Celsius, 80.15 Fahrenheit
ROM = 28 E1 CF DC 06 00 00 8F
  Chip = DS18B20
  Data = B4 01 4B 46 7F FF 0C 10 8E  CRC=8E
  Temperature = 27.25 Celsius, 81.05 Fahrenheit
ROM = 28 99 F3 DD 06 00 00 9C
  Chip = DS18B20
  Data = A3 01 4B 46 7F FF 0D 10 CE  CRC=CE
  Temperature = 26.19 Celsius, 79.14 Fahrenheit
ROM = 28 05 89 DE 06 00 00 08
  Chip = DS18B20
  Data = AE 01 4B 46 7F FF 02 10 AA  CRC=AA
  Temperature = 26.87 Celsius, 80.37 Fahrenheit
No more addresses.
It is interesting to see that even with the sensors so close in proximity
there is a slight fluctuations in the values reported (+26.17C to 26.87C) -
the specifications on the DS1820 does state that the accuracy is ±0.5C.
It may make sense to average these values to get a more consistent reading.
The protocol isn't exactly new - it has been around for a while; in fact in
1988, the Dallas Key (also known as an iButton) was integrated into a gift for
JavaOne
conference attendees (JavaRing) - surprisingly it is still possible to pick
one up on
eBay at a reasonable
price. You could easily integrate support for it into the above sketch and
use it as an identification mechanism!
![[Valid RSS]](valid-rss-rogers.png "Validate my RSS feed")