>> RASPBERRY PI - X-ARCADE MAME JOYSTICK - UPGRADED
A lot of people have been interested in the Raspberry Pi X-Arcade MAME joystick.

Just over a year ago when the Raspberry Pi 2 was released; I wrote up a
blog entry on converting my
X-Arcade
joystick into a self contained MAME machine - unfortunately at the time
I did not really finish it completely. I still had to deal with shutting
down the unit properly to avoid corruption to the file system on the SD card
and I wanted to tidy up a few things to make it travel friendly.
Step 1: Install a more universal power connection
In the first edition; the means of powering the unit was via a 5V 2A power
supply that I had lying around from my evangelism days at BlackBerry - it
was hanging out the back and not friendly for non EU countries. I definitely
had to make it more universal!
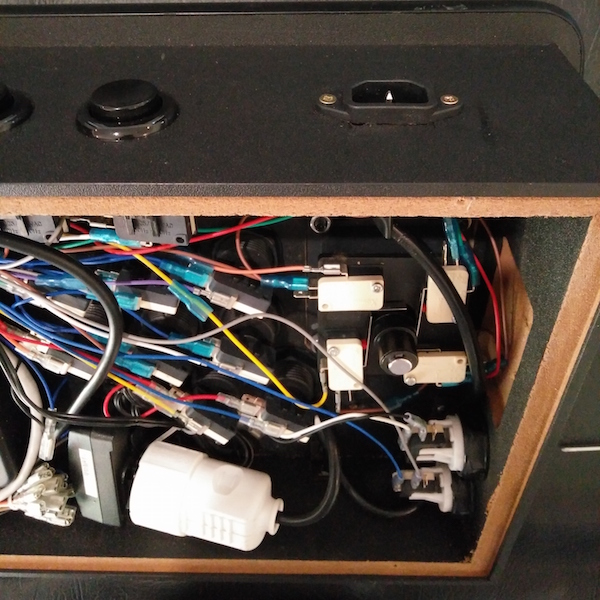
I eventually went with the International Electrotechnical Commission (IEC)
C14 coupler connection - the same ones used for desktop monitors and printers
so they are very easy to find at your local computer store. Internally; I used
the original charger what I already had and keep it simple.
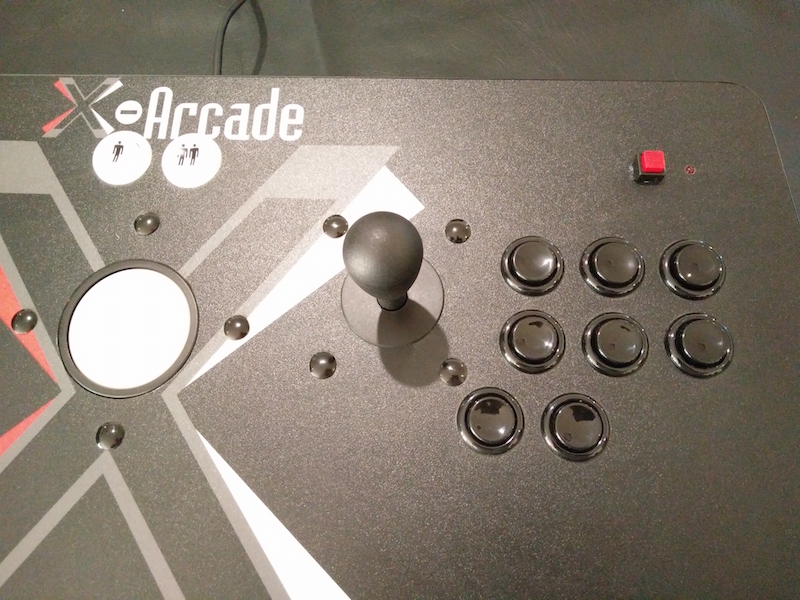
Step 2: Install a push-button for proper shutdown process
The Raspberry Pi's operating system is based on Linux; and there are tonnes
of references to discussions about how the file
system gets corrupted on power outages - not fun. Typically; in Linux you
would issue a command to properly shutdown the device - not just pull the plug.
A few solutions exist; but using a UPS (uninterruptable power supply) isn't
an option in this case nor would you want to fiddle around with extra
batteries. The easiest solution is to simply add a push button that triggers
the appropriate shutdown commands while it is powered on.
I wanted a push-button trigger - so I drilled a hole in the top near the
power LED and installed one like
this one - cheap as
and will do the job perfectly. I found an excellent
python script
that uses the python package RPi.GPIO to monitor the state of a
GPIO PIN and execute the shutdown command when the button is pressed.
It has two wires that then need to be connected to a GPIO and GND on the
Raspberry Pi 2:
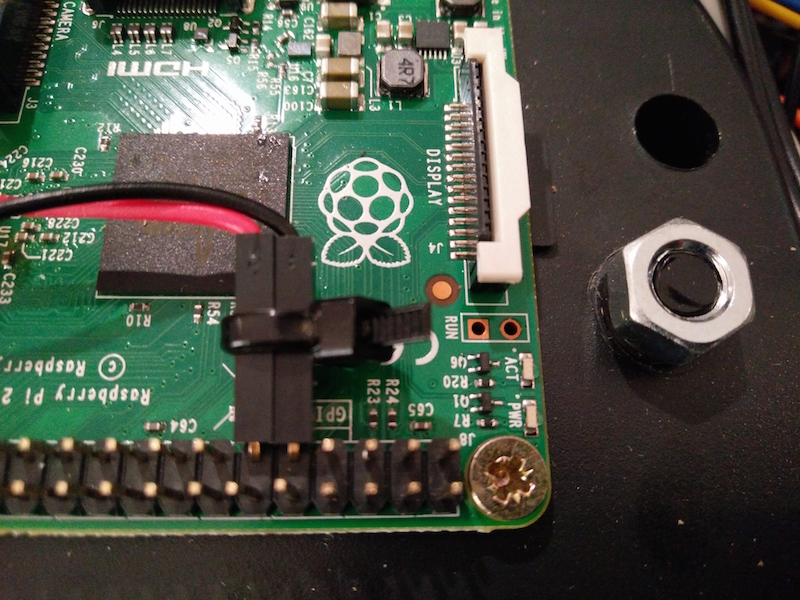
In my case; I checked in the pin out of the Raspberry Pi 2 and chose to use
PIN 17 and GND as they were next to each other nicely on the board. I also
had to modify the script slightly to work for this setup - as shown:
#!/usr/bin/python

import RPi.GPIO as GPIO
import os

gpio_pin_number=17
GPIO.setmode(GPIO.BCM)
GPIO.setup(gpio_pin_number, GPIO.IN, pull_up_down=GPIO.PUD_UP)

try:
    GPIO.wait_for_edge(gpio_pin_number, GPIO.FALLING)
    os.system("sudo shutdown -h now")
except:
    pass

GPIO.cleanup()
I saved this script into the home directory and called it
shutdown-trigger.py and made it executable - the next step was to
verify that it actually worked before integrating it into the startup process.
The last thing you want is to mess something up and have difficulty getting
back into your system.
At the time of when I setup the Raspberry Pi 2 - the RPi.GPIO
library did not yet have support for the device, so the system as it was
configured back then said the RPi.GPIO library was not supported
by the device. After googling around I found that all that was needed was to
update the operating system and library to the latest version.
After upgrading - no error messages. A press of the button. VIOLA!
The system shutdown correctly.
Step 3: Configuring the system to always monitor for the shutdown button
Now that I had verified that the script works - it is time to add it to
the system so it is always running in the background at startup. The
PiHut has a great
tutorial on how to
make this possible.
With these changes in place; a simple reboot and we can verify that
everything is working as it should. In my case; I could start it up - play
a few games and then simply press the button to shut it down. After a
few seconds; the LED light goes off and the HDMI display disconnects.
Step 4: Setting the default volume to 100%
While playing games on my TV I did notice that the volume wasn't as high
as it should be over HDMI (in fact, it was only 25%). I did some searching
and came across the ALSA
amixer
command and changed the .profile file to set the volume before
launching mame.
You may have to see what works for your particular environment and configure
it appropriately.
![[Valid RSS]](valid-rss-rogers.png "Validate my RSS feed")